Menu
Call this Thursday to Get 10% OFF
Call this Thursday to Get 10% OFF
24-Hour Emergency Electricians in DallasCall this Thursday to Get 10% OFF
Call this Thursday to Get 10% OFF
24-Hour Emergency Electricians in Dallas
Many homes across the country rely on ceiling fans to maintain a conducive and comfortable indoor space. However, these systems only get the care they deserve if it breaks down in the dead of summer. It may be time for an upgrade if you have an old or frequently malfunctioning ceiling fan. Even if your current unit runs, it doesn’t mean it is in tip-top condition. At Mr. Electric of Dallas, we can help you upgrade to a more efficient and modern option.
Before buying a new ceiling fan at the local home improvement store, we recommend you consult an affordable electrician for professional advice. We take ceiling fan replacement to a new level by ensuring you get fashion and function without compromising quality. Please don’t take on the project without the skills and tools required to avoid severe injuries and property damage.
Now that you’ve turned ceiling fan replacement into a DIY project, you must ensure you have the right tools for the job. These include a new fan, voltage testers, a ladder, screwdrivers, wire caps and cutters, and a friend. Once you have checked every box, replace your unit.
Safety is the most crucial factor to consider, and it starts by ensuring the power is turned off. Electricity can cause severe injuries or, worse, start a fire. Use the voltage tester to determine if power is running to the fan and turn the switch on and off for peace of mind. Once you are safe, you can remove the old or damaged fan.
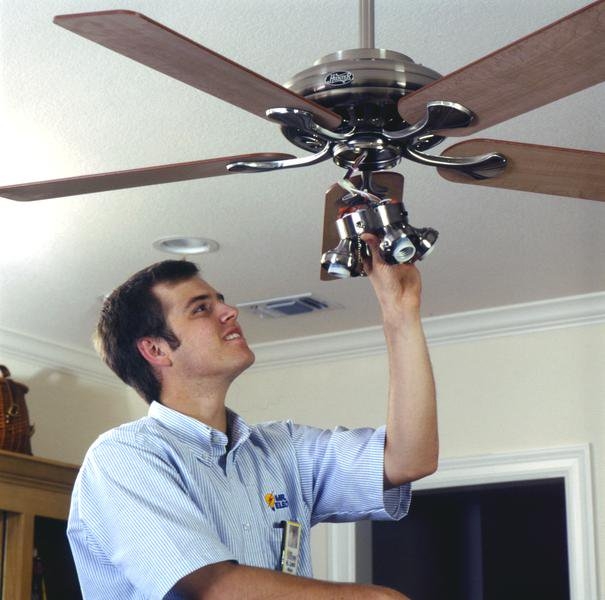
This step requires using screwdrivers and a friend or family member to hold up the fan while you work. It is quite the arm workout, so ensure you choose a person who can withstand the weight as you quickly remove it. The process varies depending on your type of fan, but they all require you to unscrew pieces of the fan and light until you get it off. Take a picture of how the wires are connected to avoid damaging the new fan.
Once you have removed the old unit, it’s time to install the new fan. Use the new screws to secure the ceiling bracket into the holes in the electrical box. Bring each wire through its respective holes before tightening the screws in place.
No matter the size or complexity of your residential or commercial project, you can count on us to provide professional, high-quality results.
For professional and cost-effective smoke detector replacement in Dallas, TX, rely on the qualified and experienced electricians in Dallas, TX.…

Are you tired of waiting until June or July to enjoy your swimming pool? If you want to get the most…
Dealing with electrical problems can be frustrating and challenging for busy families and businesses. At Mr. Electric of Dallas, we are…
Has it been too long since your last appointment with a qualified electrician? Sometimes, damaged circuits, outdated wiring, and other…

Are you looking for creative ways to decrease your monthly energy usage while improving the convenience and comfort of your living…
.webp)
Different makes and models have various ways of prepping the unit, so follow the manufacturer’s instructions to assemble it correctly. The most common way is to install the canopy and download the assembly, ensuring the wires go through. If the wires are long, you can use the wire cutters to shorten them.
Once the canopy and wires are in place, attach the blade, and add the switch housing and the cover plate, respectively. Review the process to ensure you have left nothing out, and then turn on the power. You can do this simple exercise without a professional, but if you prefer a more hands-off approach, we can help.
Contact us at Mr. Electric of Dallas and schedule a consultation with an expert electrician. We guarantee top-quality electrical services at competitive market rates.
At Mr. Electric, we understand that dealing with electrical issues can be frustrating and inconvenient. However, knowing basic electrical troubleshooting steps can save the day and prevent serious electrical hazards. In this guide, we’ll share basic electrical troubleshooting tips for homeowners. But remember, if an…
Read More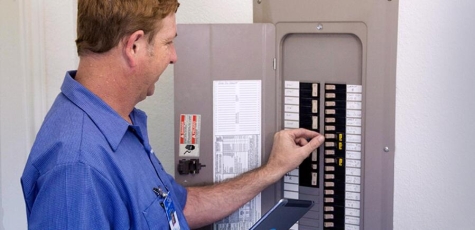
Frequently tripping circuit breakers often point to overloading, short circuits, or ground faults. However, breakers that keep tripping could be a sign of a failing electrical panel, outdated wiring, or loose connections. Frequent circuit breaker tripping is not just a safety hazard, but it’s also…
Read More
Electrical safety and reliability shouldn’t be taken lightly. Whether you’re a homeowner looking to list your home or you’ve noticed an issue with your electrical system, electrical inspections are important. We cannot emphasize this enough. It’s in your best interest to have a licensed electrician…
Read More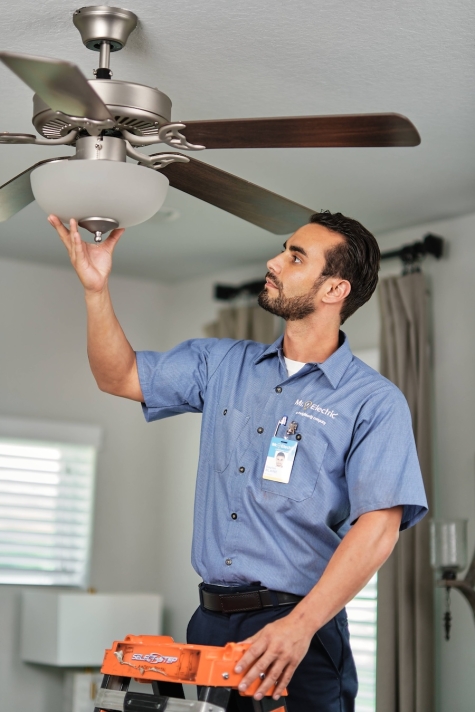
Most households turn to the AC and ceiling fans to deal with heat when the outside temperatures soar. Both systems can make a big difference to comfort, but they work in different ways to achieve this. With rising energy costs, households are finding ways to…
Read More